

About
No more login/password lost, only one login/password to protect all your web accounts. Secure remote storage of your personnal passwords, bookmarks and personnal notes.
Menu
Support FireWebSSO
If you are interrested in supporting FireWebSSO and would like to contribute, you are welcome to make a small donation through the Donate link. It will be be a great help to maintain online the public server and it will be appreciated.
How to capture an authentication form.
Using the capture tools
The process of capturing an authentication form in order to create a new site, may be started by different means:
- The FireWebSSO toolbar
- The FireWebSSO context menu
- The FireWebSSO Tools menu
- The Capture icon tool in the firefox URL-bar
- The Auto-Capture tool
The FireWebSSO toolbar
By default, when the firewesso.xpi addon is installed, the FireWebSSO toolbar is displayed as a custom tool-bar of Firefox.
This is the more convenient way to access the FireWebSSO features.
Step by step capturing
- Step 1: click on the
 icon to capture the URL of the current web page.
 - Step 2: the toolbar capture wizard is opened and displays the icons featuring the fields capture of the authentication form.

- Step 3: click on the
 icon to initiate the capture of the login field.
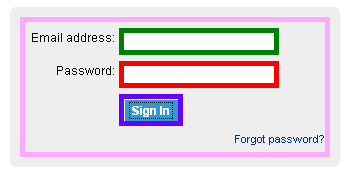
 - Step 4: click on the login field: the border of the field should become colored.
- Step 5: click on the
 icon to capture the password field.
 - Step 6: click on the password field: the border of the field should become colored.
- Step 7: click on the
 icon to capture the submit button.
 - Step 8: click on the submit button: the borders of the button and the form should become colored:
- Step 9: click on the
 icon to validate your capture and send it securely to the FireWebSSO server.
Take a tour to the screencast section to see a capture sequence in action.
The FireWebSSO context menu
The context menu provides another way to capture a form. All the actions (capture URL/login/password...) are available in the context menu of the HTML page :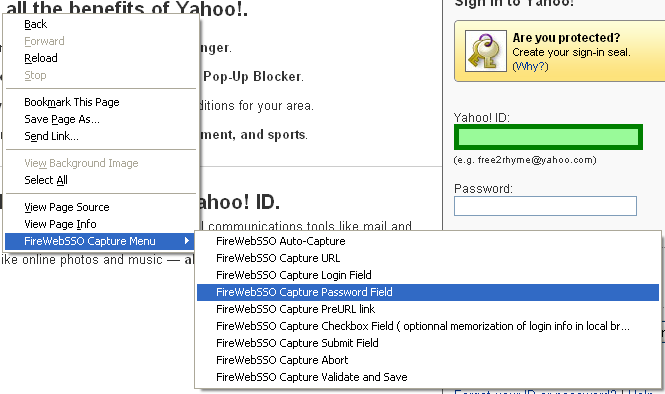
The FireWebSSO Tools menu
The FireWebSSO tools menu is accessible from the main Tools menu of Firefox. This menu can also be dropped in the customizable tool-bar pallette of FireFox: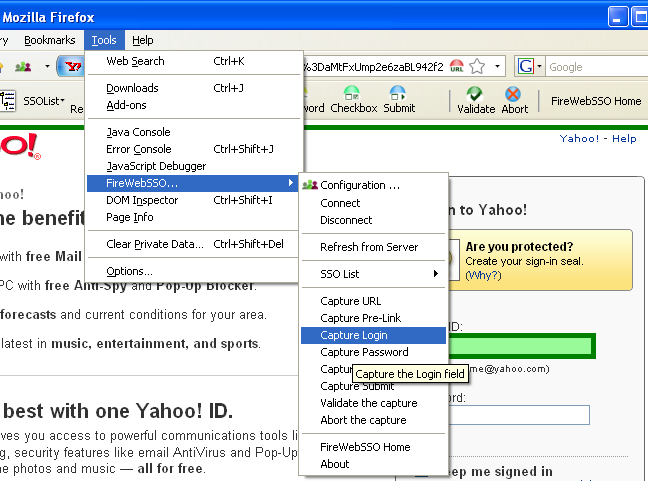
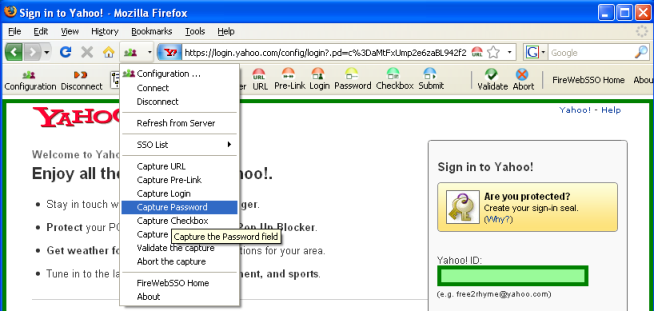
The Capture icon tool in the firefox URL-bar
The navigation url-bar contains the icon and allows to start the capture sequence even if the FireWebSSO toolbar is hidden.
